Create and send emails
With this software, you can create stunning emails with full localization support, ensuring they are both highly maintainable and easy to manage.
Why do we use Symfony Mailer?
The main reason we don't use CodeIgniter4's built-in mailer library and instead use Symfony Mailer is that CodeIgniter4's email library is too basic and does not meet our requirements. In contrast, Symfony Mailer is a powerful and widely popular solution.
Symfony Mailer is a composer package, and it is not bundled with this software. You will need to install it manually after installing this software. However, don't worry, all the instructions are provided in the Installation chapter.
You can learn more about Symfony Mailer from the official documentation of Symfony Mailer.
The layout of the email
This software supports great-looking email layouts, so you don’t have to send plain, boring looking emails.
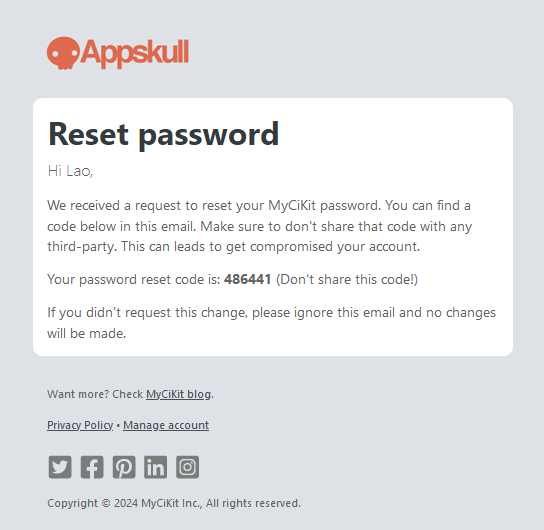
This software includes a great-looking email layout with full localization support, making it suitable for every email you send. However, you're not limited to the default layout you can create as many unique email layouts as you need.
If you want to modify the look and feel of the default email layout, you can customize the light_mode_email.css and dark_mode_email.css files located in the [app_root]\Nudasoft\App\Assets\src\css directory.
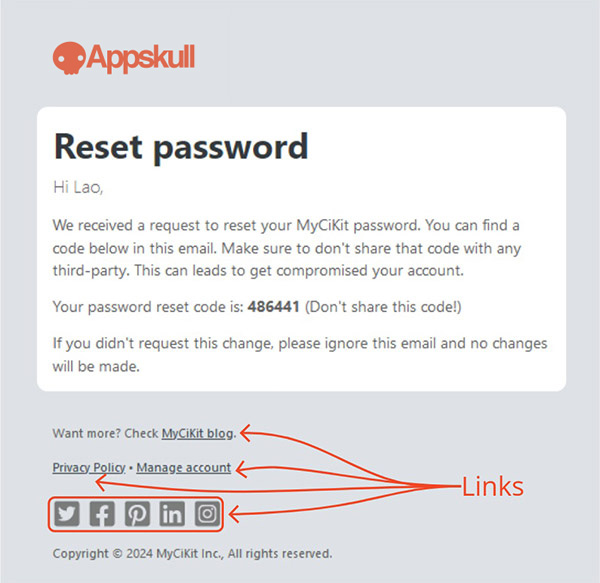
To update the links in the default email layout, open the layout file: [app_root]\Nudasoft\App\Views\SymfonyMailerEmail\RootEmailLayout.html.twig in any text editor, make the necessary changes, and save.
Steps to create and send an email
To create and send an email in this software, please follow the steps below:
-
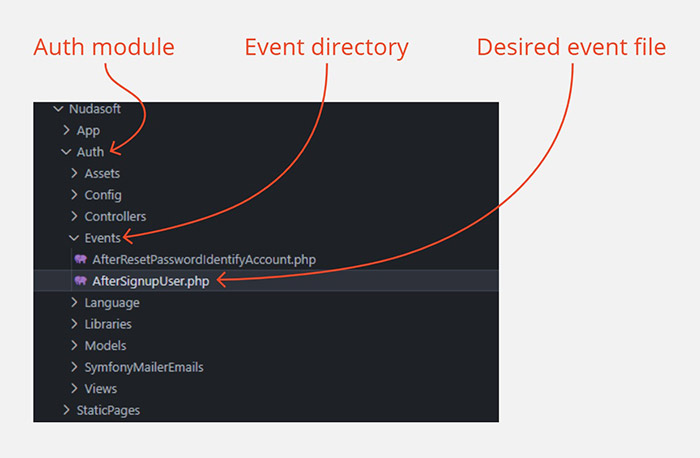
Create a new 'event file' in the 'Events' directory of the corresponding module if needed
We use CodeIgniter 4's built-in event mechanism to send emails, ensuring that event actions are well-organized and maintainable. You don't always need to create a new event file for every email in this software. If an event file already exists for the desired event, simply use it to add a new event action.
For example, let's say you want to send a Welcome email every time a new user signs up. User sign-up is part of the Auth module, and the relevant event might be something like after signup or after user signup. First, check if a related/relevant event file already exists in the Events directory. If it does, that's great! use it. If not, you'll need to create a new event file with a name that reflects the nature of the event.
Events are action-based, so it's important to include words like Before or After in the event file names. For instance, if you want to send an email after the user signs up, the event file name should be something like AfterSignupUser or AfterUserSignup. Similarly, if you want to perform an action before the user signs up, create an event file with a name like BeforeUserSignup.
-
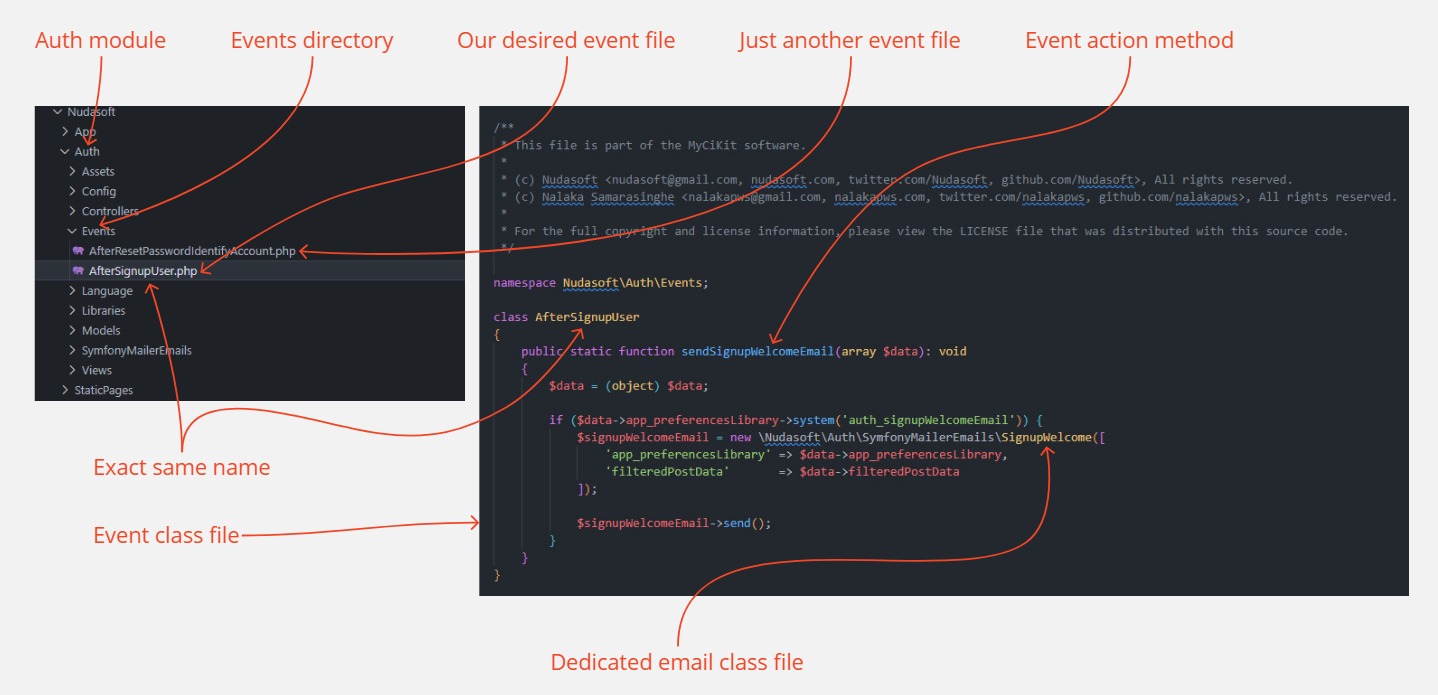
Add a new 'event action method' in the event file
Now, you need to add an event action method to the desired event file. Name it something meaningful that clearly expresses its purpose. Since the event file is a class, you can create as many event action methods as needed within it.
-
Register the event in the 'Events.php' configuration file
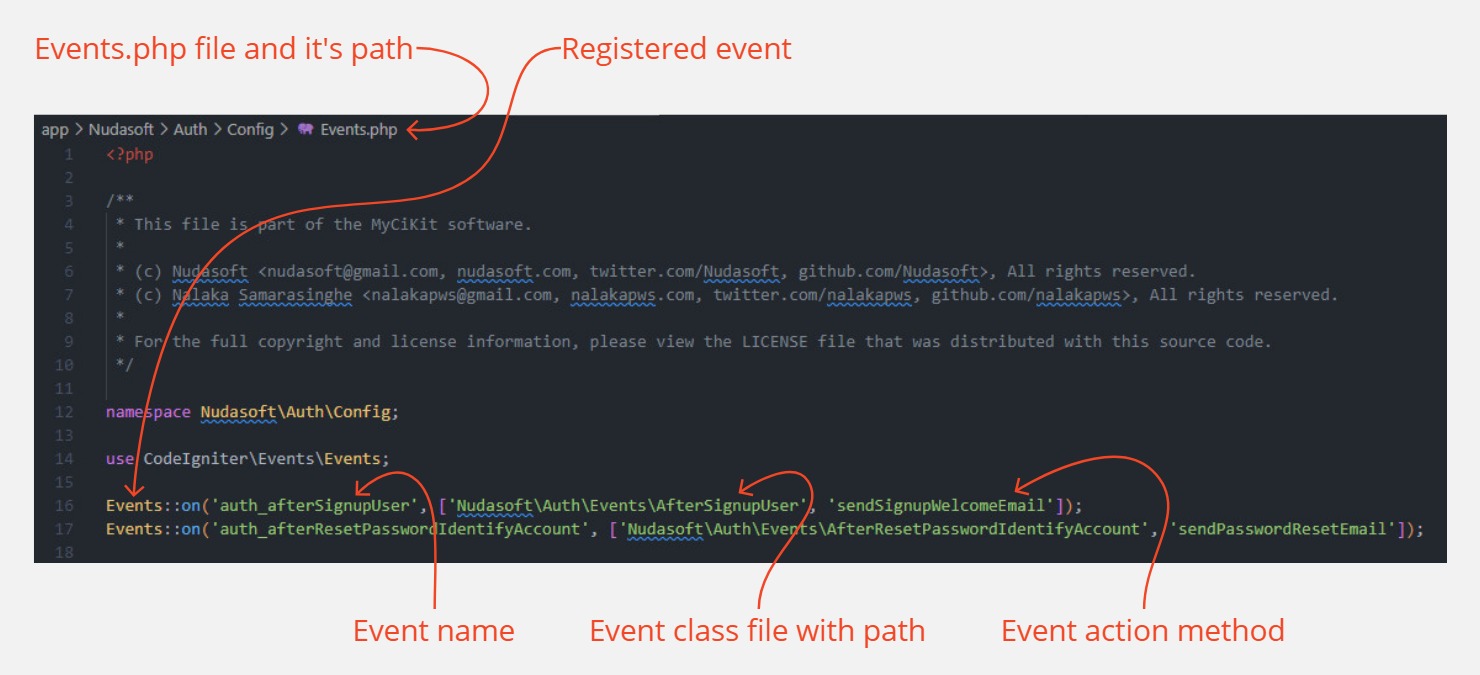
When registering an event, you need to create an event name. Follow this naming convention when creating the name: [myModule]_[after/before]EventName. For example, auth_afterSignupUser.
-
Create a new email class to build the email

You need to create a dedicated class for each email you create. This class is used to build the email. If you want to add localization support, create a corresponding language file and include the necessary language keys and strings. As an example, please review this email class:
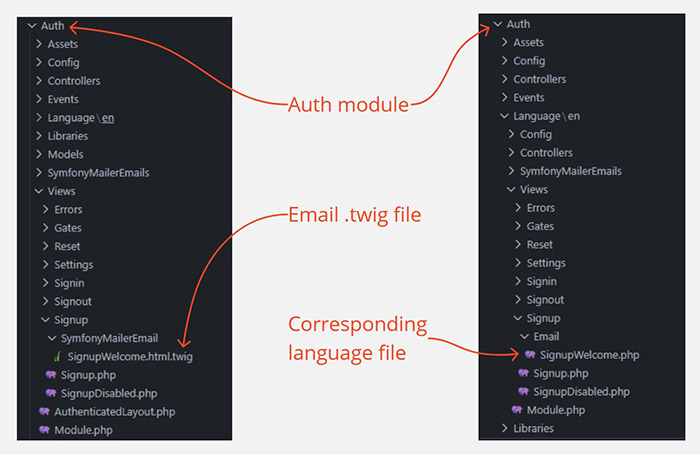
[app_root]\Nudasoft\Auth\SymfonyMailerEmails\SignupWelcome.php. -
Create a new .twig view file
With Symfony Mailer, you must use .twig files as view files for emails. You need a dedicated .twig file for each email you create. If you want to add localization support, you will need to create a corresponding language file. As an example, please review this .twig file:
[app_root]\Nudasoft\Auth\Views\Signup\SymfonyMailerEmail\SignupWelcome.html.twig. -
Create an event trigger to send the email
Finally, to send the email, you need to add the event trigger at the point where you want the event to occur. In most cases, this would be within a controller method.
                                    // To send signup welcome email
                                    Events::trigger('auth_afterSignupUser', [
                                        'app_preferencesLibrary' => $this->app_preferencesLibrary,
                                        'filteredPostData'       => (object) $filteredPostData
                                    ]);